Hello!
Have you ever lamented how all synth sounds are so similar in timbre? And how sometimes using effects still fail to lose that uni-sound digital sheen on everything?
Today I will teach you the single most effective way to bring up and transform sounds in a mix that I am aware of, without using any effects.
The idea is simply to run the sound through a physical object, and let it´s formants and resonances be imprinted on the sound. This is a common sound design trick in movies, but less used in music production.
The best way is to use transducer elements. They are basically a bit like speaker elements without the cone. Alone they are almost silent, but when they touch an object, the vibrations will be transported, effectively creating a sound radiating surface out of anything.
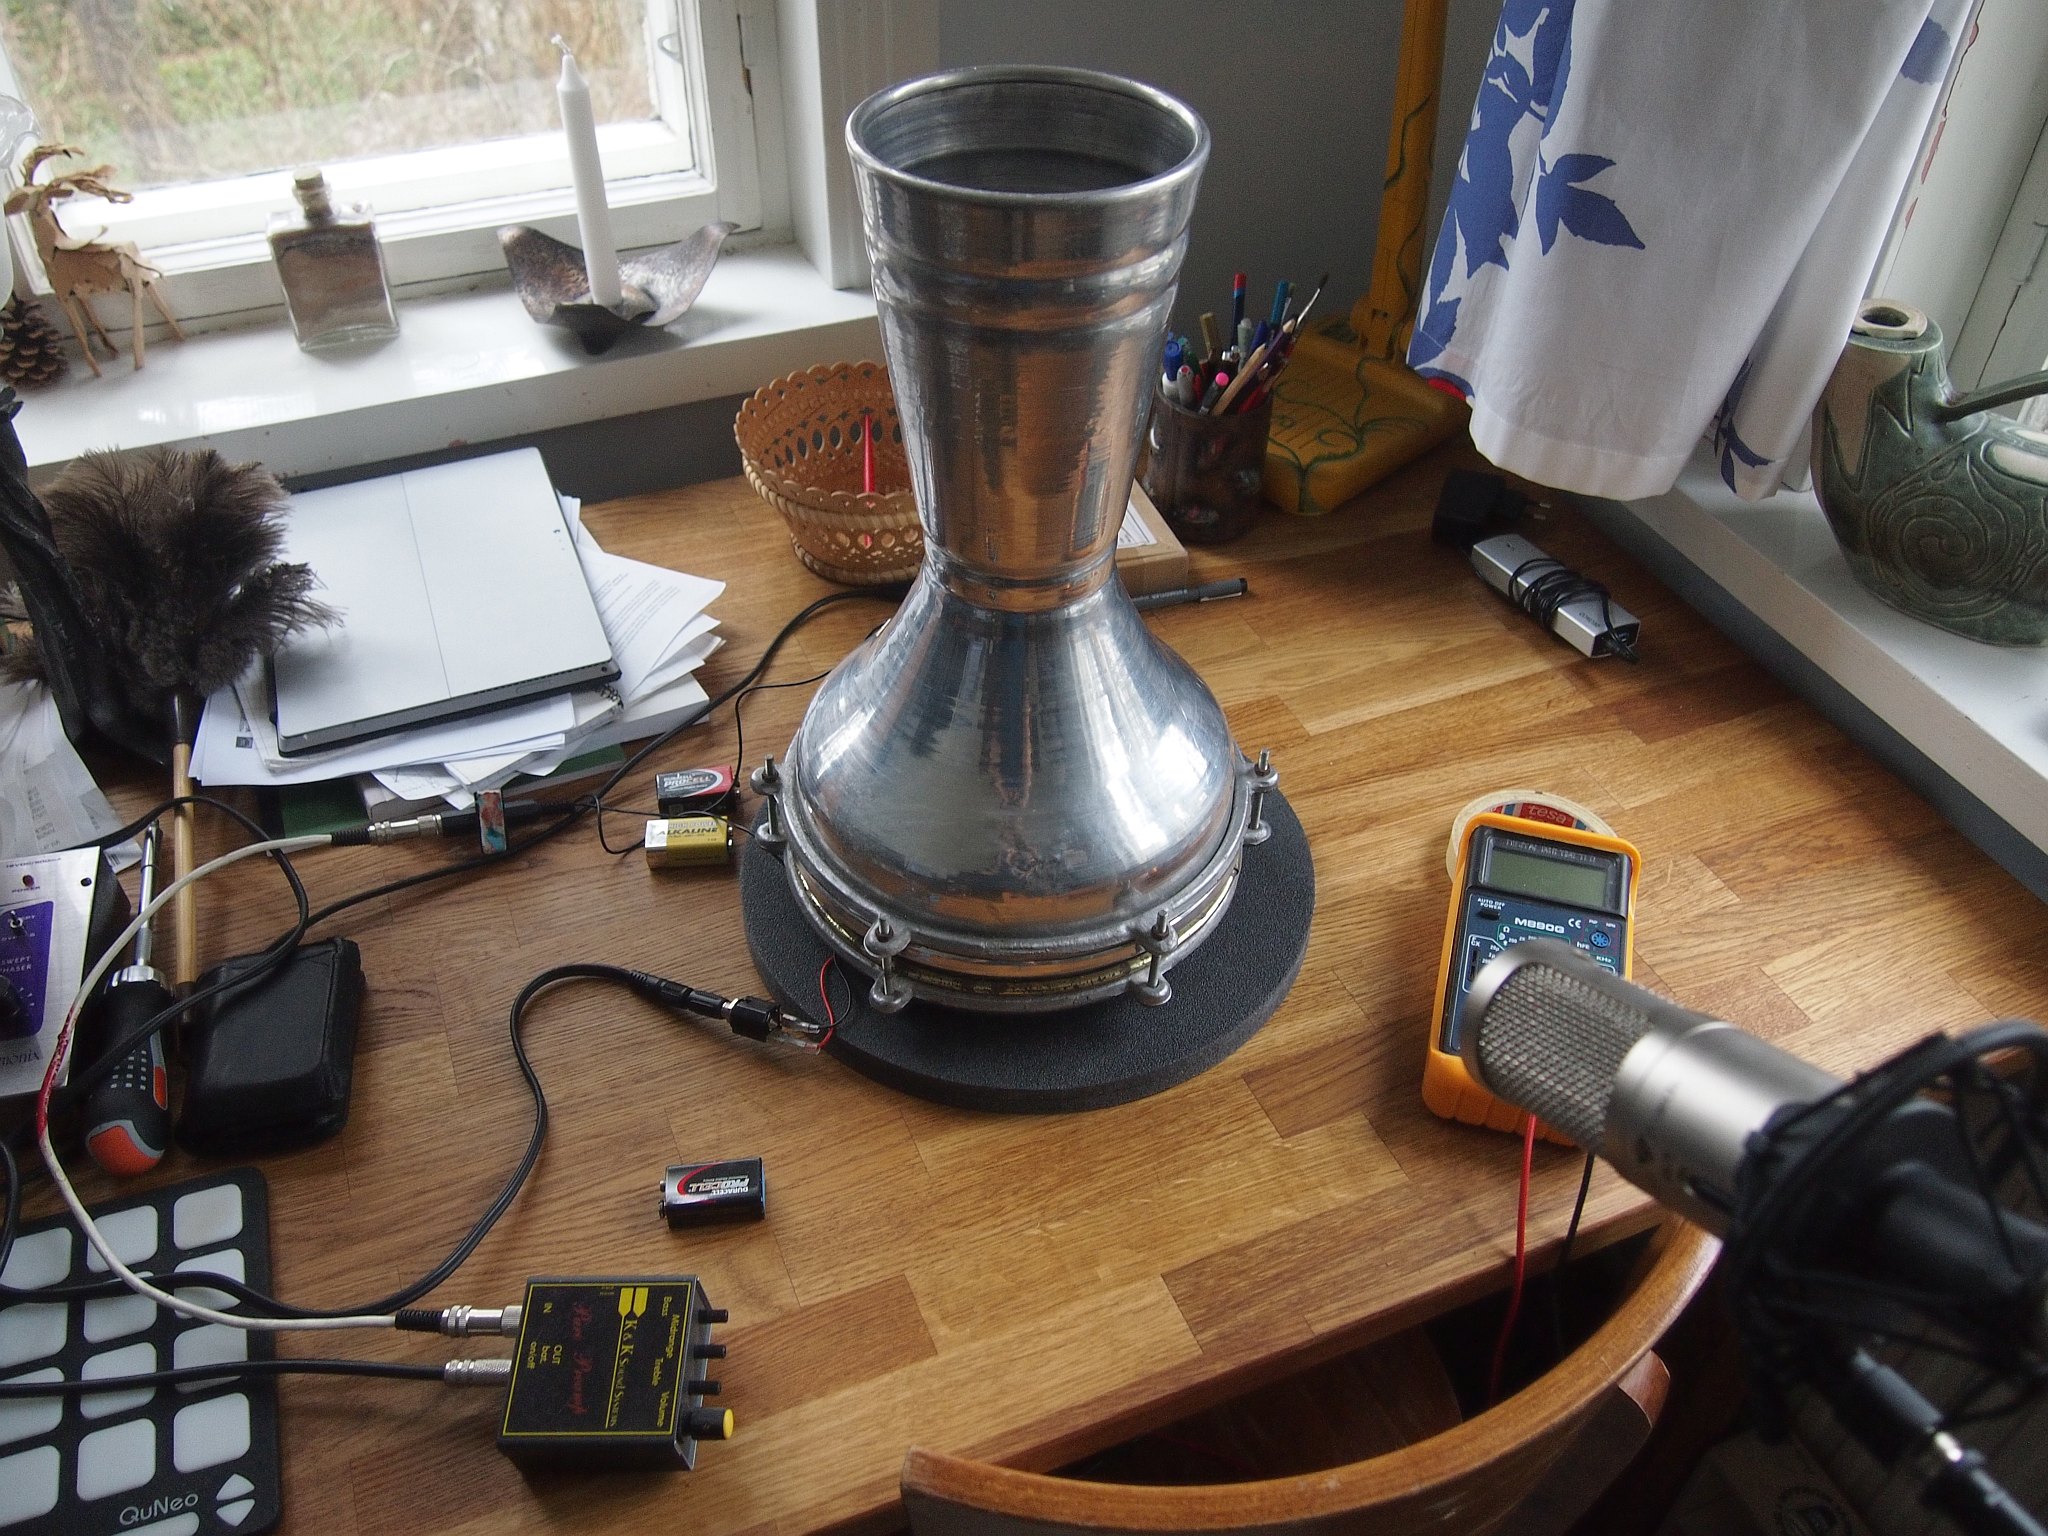
Here is a basically anemic bassline first run through a waterphone, and then a darbouka. The harmonic content will get noticeably louder, and both objects have very much a sound of their own. The waterphone is moved around while the sound is playing, and then a stereo track is created out of two mono instances, creating that lovely flanger-like sound. The darbouka just sits there, but you can really hear how the bassline takes on the timbre, if you have ever played one yourself.
I have a large diaphgram condenser microphone placed above the objects to capture a bit of air sound, but basically what you hear is the sound from a contact microphone layered over the original bassline.

The transducer elements are around 20-40$ or so on Ebay. I´m using a super cheap Lepai amp from Ebay to run them. They cost from 10$ upwards, and are high quality! I use quality contact microphones from K&K. You can also build a contact microphone out of a buzzer element, there´s lots of tutorials on the net. The twin spot mics I use are around 70$ online, and the preamp is around 100$, so combined you would be spending around 200$ for a quality setup, and less if you scavenge and get creative. You will want contact microphones anyway sooner or later, so they are a good investment.
If you are too lazy to work with the transducers, you can also just place a loudspeaker next to the object you want to use, and use contact microphones like usual. At least some of the vibrational energy will be picked up by the object, altough I suspect you will be losing a lot of volume, and probably get a bit more coloured frequency response.
I bought my mics and the preamp from Experimental Musical Instruments, the company of Bart Hopkins, who is the grand old man of experimental instrument building, and who used to publish Experimental Instruments, the probably most interesting (maga)zine in history of music publishing. The complete back catalogue of the issues is a very cheap and much recommended buy, and will provide you with at least a lifetime´s worth of ideas for sound creation and design. (the site seems to be experiencing problems as I´m writing this, but I´m sure it will be online sooner or later…)
So, that´s all! Now just go and experiment. This will work wonders with pads etc. Also you can create a plate reverb with a bit of tinkering (I might make another tutorial on this later!), and actually the waterphone has also a decay of several seconds if everything is set right, so it can also act as a more portable version of a full-sized plate element.
One thought on “audio crafting #3 – Physical filters”